Myanmar Payment Union (MPU) Card များဖြင့် Domain, Web Hosting, Servers, Services များကို ဝယ်ယူခြင်း။
World Wide Myanmar (WWM) Co., Ltd. မှ Domain, Web Hosting, Servers, Services များကို Paypal နှင့် Bank Transfer တို့အပြင် MPU ကဒ်ဖြင့် တိုက်ရိုက်ငွေပေးချေ ဝယ်ယူနိုင်ရန် ထည့်သွင်းထားပါတယ်။
မိမိ ဝယ်ယူလိုသော Domain, Web Hosting, Servers, Services ရွေးခြင်းခြင်း
ဥပမာ – WWM Host Diamond
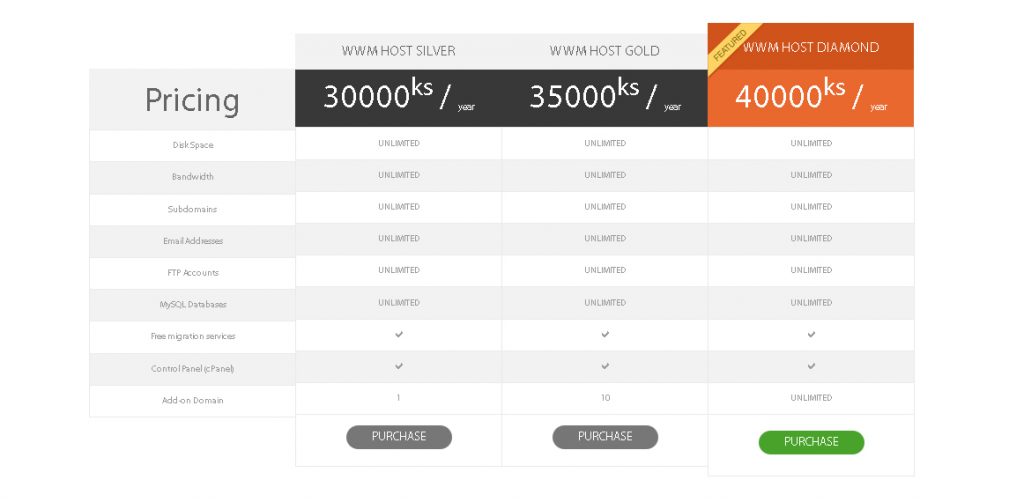
Hosting Package ရွေးပြီးလျှင်
နောက်တစ်ခု Domain ရွေးချယ်ရန်ဖြစ်ပါတယ်။ Read more
မိမိ Domain အား Blogspot ဖြင့် ချိတ်ဆက်အသုံးပြုခြင်း
မိမိ Domain အား Blogspot ဖြင့် ချိတ်ဆက်အသုံးပြုခြင်းဆိုရာတွင် မိမိရဲ့ blogspot.com က လိပ်စာ နဲ့ မိမိ ဝယ်ယူထားတဲ့ Domain Name ကို ချိတ်ဆက်ပြီး yourdomainname.blogspot.com အစား yourdomainname.com ဆိုတဲ့ လိပ်စာကို ပြောင်းလဲအသုံးပြုခြင်းပါပဲ။
ဒီနေရာမှာ အပိုင်း ၄ ခုလောက် ခွဲပြီးအဆင့်လိုက်လုပ်ဆောင်ပြသွားပါမယ်။
၁။ Blogger တွင် Custom Domain ထည့်သွင်းခြင်း။
၂။ Domain ပိုဆိုင်မူ စိစစ်ရန် Token ရယူခြင်း (Ownership verification token)
၃။ DNS (Domain Name System) ပြောင်းလဲခြင်း။
၄။ Ownership အား Verify လုပ်ခြင်း
တို့ဖြစ်ကြပါတယ်။
၁။ Blogger တွင် Custom Domain ထည့်သွင်းခြင်း။
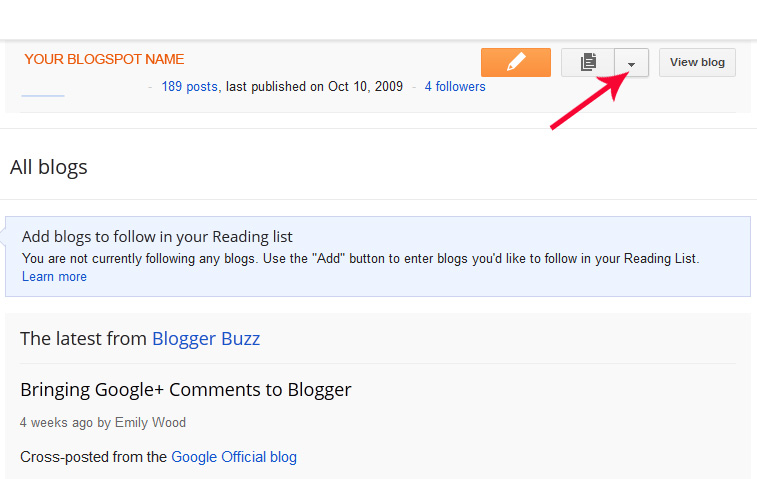
မိမိမှာ blogspot ရှိတယ်ဆိုရင် ပထမဦးစွာ http://www.blogger.com/ ထဲကို ဝင်လိုက်တာနဲ့ မိမိရဲ့ blogspot site က ပေါ်နေပါလိမ့်မယ်… ပုံမှာပြထားတဲ့ အတိုင်း Setting > Basic ဆိုတဲ့အထဲကိုသွားပါ။
မိမိ Domain အား Blogspot ဖြင့် ချိတ်ဆက်အသုံးပြုခြင်း
Publishing ရဲ့ အောက်နားမှာ Add Custom Domain ဆိုတာကို ရွေးချယ်လိုက်ပါ။
ပြီးရင် Advanced settings ဆိုတဲ့အထဲကို ရောက်သွားပါလိမ့်မယ်။
ပုံမှာဖော်ပြထားတဲ့အတိုင်း မိမိဝယ်ယူထားတဲ့ Domain name ကိုရိုက်ထည့်ပြီး Save ကိုနိုပ်လိုက်ပါ။
“We have not been able to verify your authority to this domain. Error 12. Please follow the settings instructions.” ဆိုတဲ့ error ထွက်လာပါလိမ့်မယ်။
မိမိ Domain အား Blogspot ဖြင့် ချိတ်ဆက်အသုံးပြုခြင်း
၂။ Domain ပိုဆိုင်မူ စိစစ်ရန် Token ရယူခြင်း (Ownership verification token)
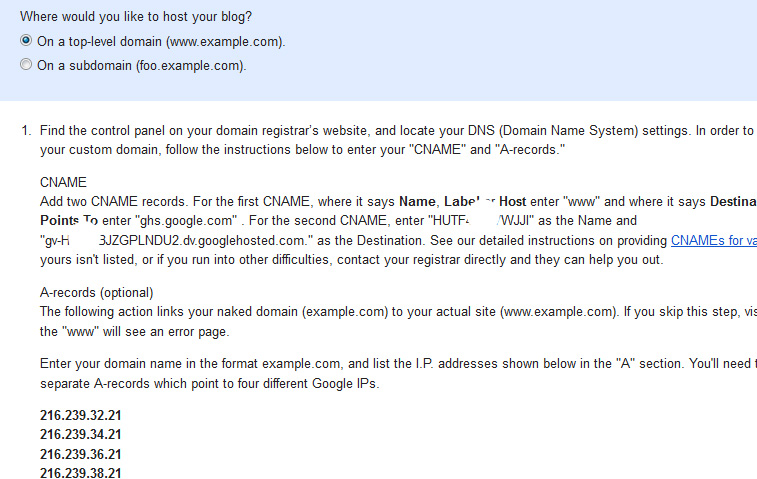
စောစောတုန်းက အဆင့် ၁ မှာ ပြခဲ့သလို Custom Domain ရယူပြီးတဲ့အချိန်မှာ Save Button နိုပ်ရင် Error Code နဲ့အတူ CNAME ၂ ခုထွက်လာသလို အဲ့လိုမှမဟုတ်ရင် Settings Instructions ဆိုတဲ့နေရာမှာ နိုပ်ရင်လည်း အောက်ပါပုံမှာ ပြထားသလို CNAME ၂ ခုကို ရယူနိုင်ပါတယ်။
Point လုပ်ရန် CNAME နှစ်ခုထွက်လာပါလိမ့်မယ်။
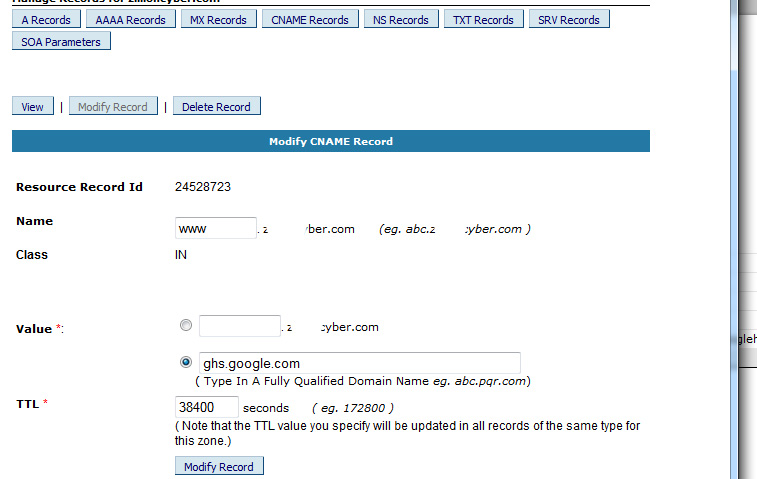
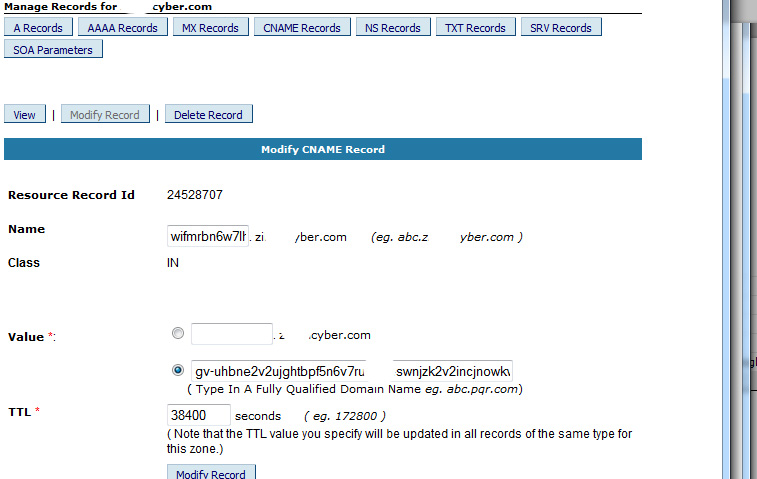
1. www ဆိုတဲ့ “name/label/host” ဆိုတဲ့ တစ်ခုနဲ့ “Address/Destination/Target” က ghs.google.com ဆိုပြီးဖြစ်ပါတယ်။
2. နောက်တစ်ခုကတော့ verification code ဖြစ်ပါတယ်။ သူကတော့ တစ်ဦးနဲ့တစ်ဦးတူမှာမဟုတ်ပါဘူး
ဥပမာ – “name/label/host” ဆိုတဲ့နေရာမှာ SFEFA52A22 ဆိုပြီးဖြစ်နိုင်ပြီး “Address/Destination/Target” က gv-HRAABJZSDDD33D2DD2DLNUYTDU2.MA.domainverify.googlehosted.com. ဆိုပြီးဖြစ်ပါတယ်။
အထက်ဖော်ပြပါ CNAME နှစ်ခုစလုံးကို မှတ်သားထားဖို့လိုပါတယ်။
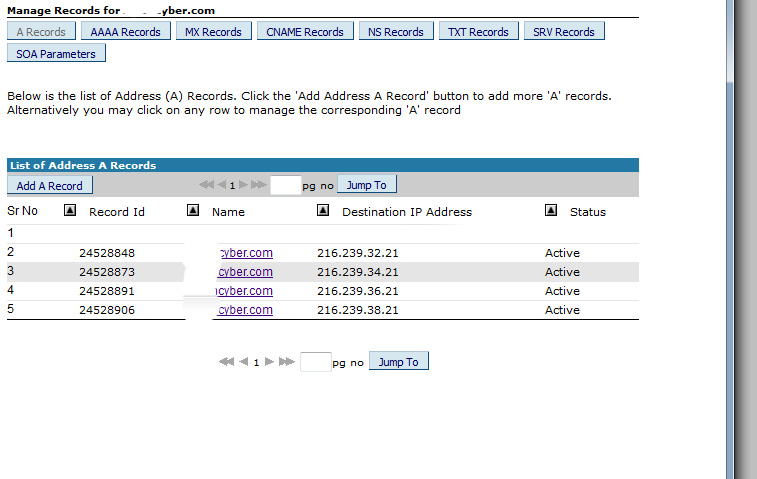
နောက်တစ်ခုက အကယ်၍ User တွေက မိမိရဲ့ domain ကို www မရိုက်ထည့်ပဲ ဝင်ခဲ့မယ်ဆိုရင် error တွေကျလာတတ်ပါတယ်.. အဲ့အတွက် “A Records” ၄ ခုလည်း မှတ်သားထားရန်လိုပါတယ်။
216.239.32.21
216.239.34.21
216.239.36.21
216.239.38.21
တွေဖြစ်ပါတယ်။
၃။ DNS (Domain Name System) ပြောင်းလဲခြင်း။
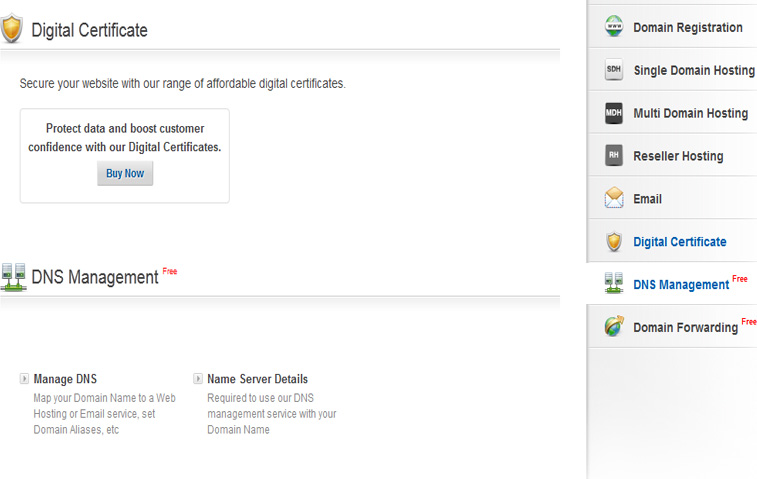
မိမိရဲ့ ဒိုမိန်း Control Panel ထဲကို ဝင်ပါ။
CNAME နဲ့ A Record ကို ပုံမှာပြထားသည့်အတိုင်း ထည့်သွင်းရန်သာဖြစ်ပါတယ်။
၄။ Ownership အား Verify လုပ်ခြင်း
နောက်ဆုံးအဆင့်ကတော့ မိမိရဲ့ DNS မှာ စောစောတုန်းက A Record and CName တွေထည့်သွင်းပြီးလို့ နာရီဝက်ခန့်အကြာ DNS Active ဖြစ်ပါက Blogspot ထဲကိုဝင်၍
Add custom domain မှနေ၍ မိမိရဲ့ domain အမည်ကို (e.g www.yourdomainname.com) ဟူ၍ ရိုက်ထည့်ပြီး Save လုပ်လိုက်ရင် ရပါပြီ။
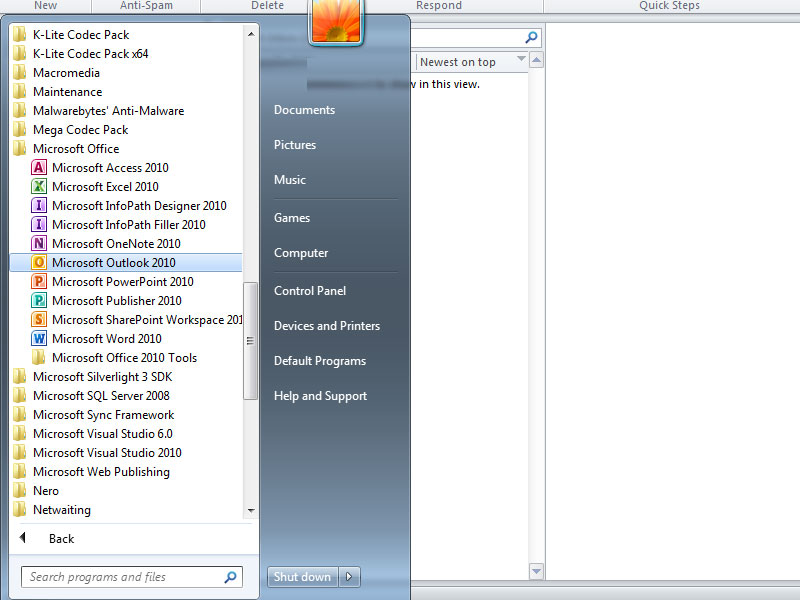
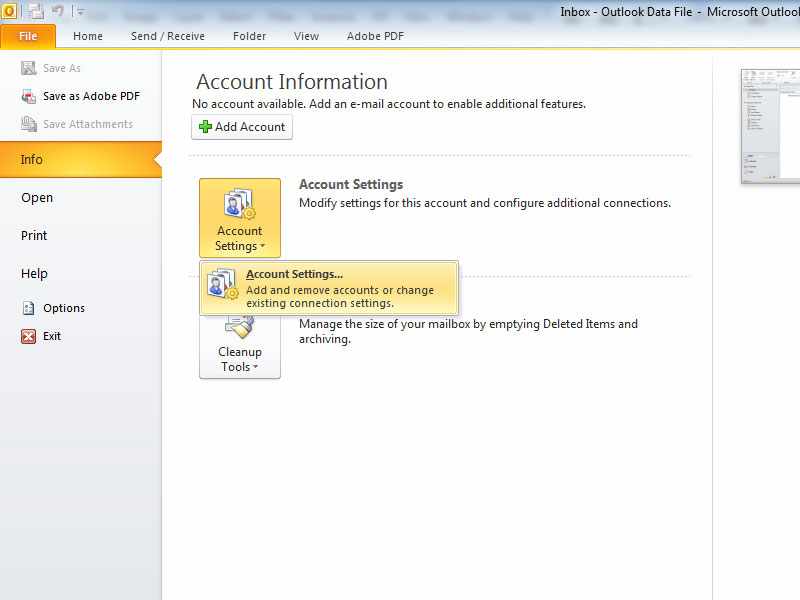
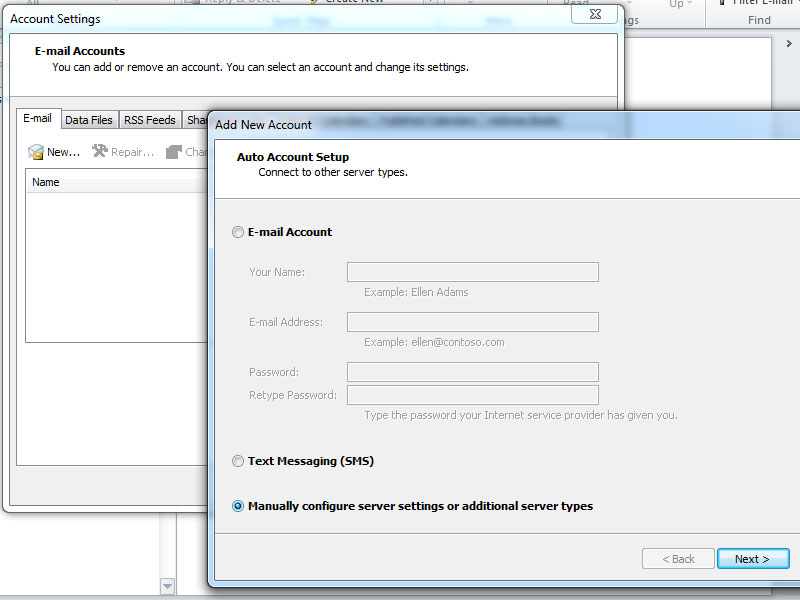
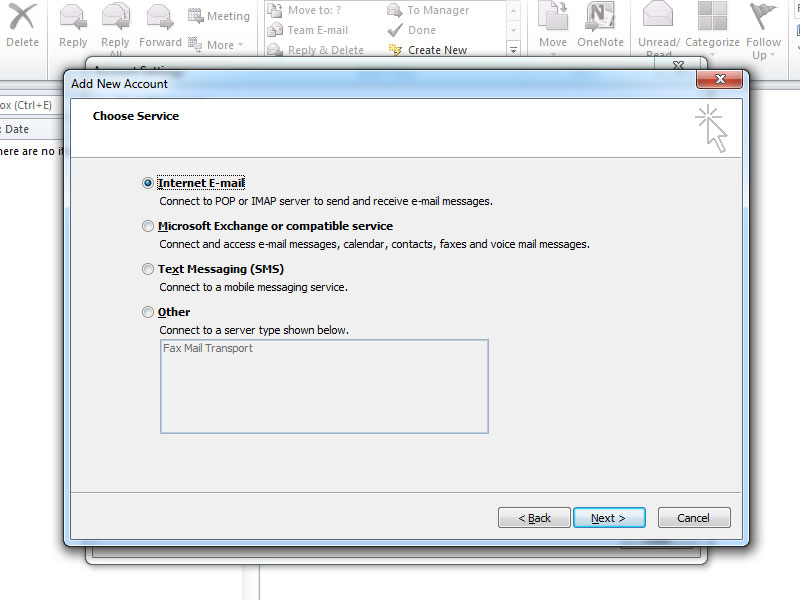
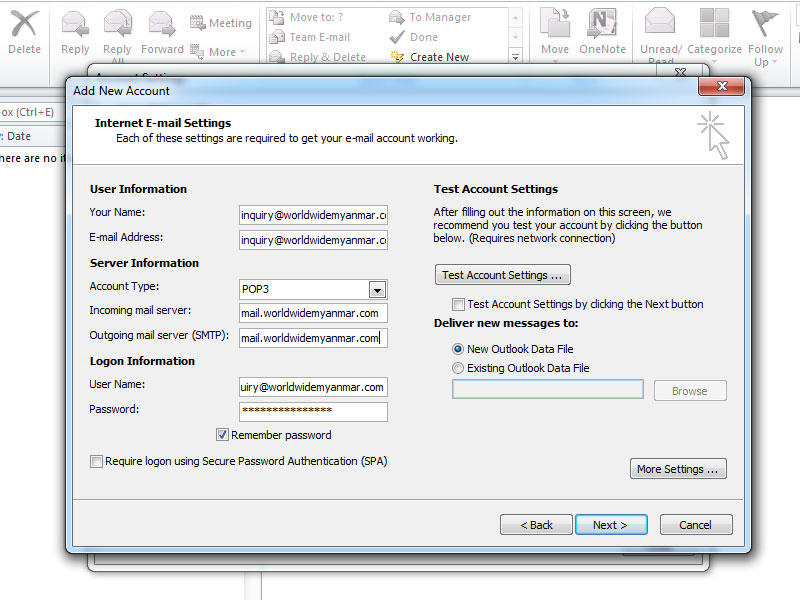
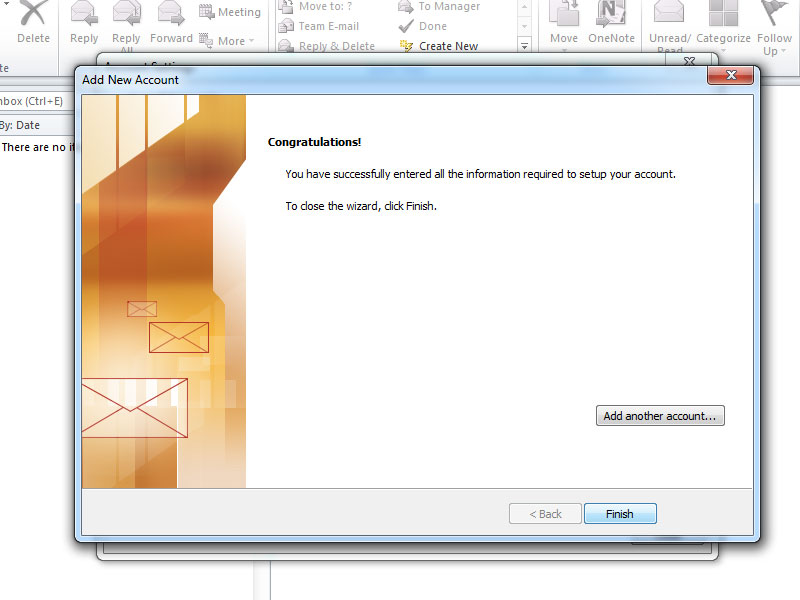
Microsoft Outlook Express ဖြင့် Email ကိုအသုံးပြုရန်
Microsoft Outlook Express ဖြင့် Email ကိုအသုံးပြုရန်
Outlook Express ဖြင့် မိမိ၏ မေးလ်အကောင့်ကို ဝင်ရောက်အသုံးပြုလိုပါက ပထမဦးစွာ Control Panel တွင် Email Account တစ်ခုကို Create လုပ်ထားရန်လိုအပ်ပါသည်။ ၄င်းနောက်တွင် အောက်ပါ ပုံတွင်ဖော်ပြထားသည့် အဆင့်အဆင့် အတိုင်း လုပ်ဆောင်ပြီး အသုံးပြုနိုင်မည်ဖြစ်သည်။
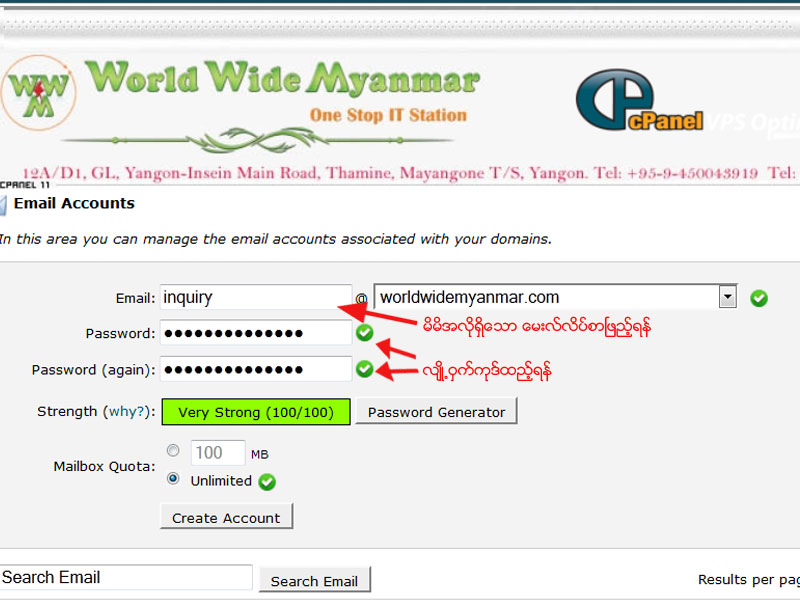
Create Email Accounts (or) အီးမေလ်းအကောင့်တစ်ခု တည်ဆောက်ခြင်း
Create Email Accounts (or) အီးမေလ်းအကောင့်တစ်ခု တည်ဆောက်ခြင်း
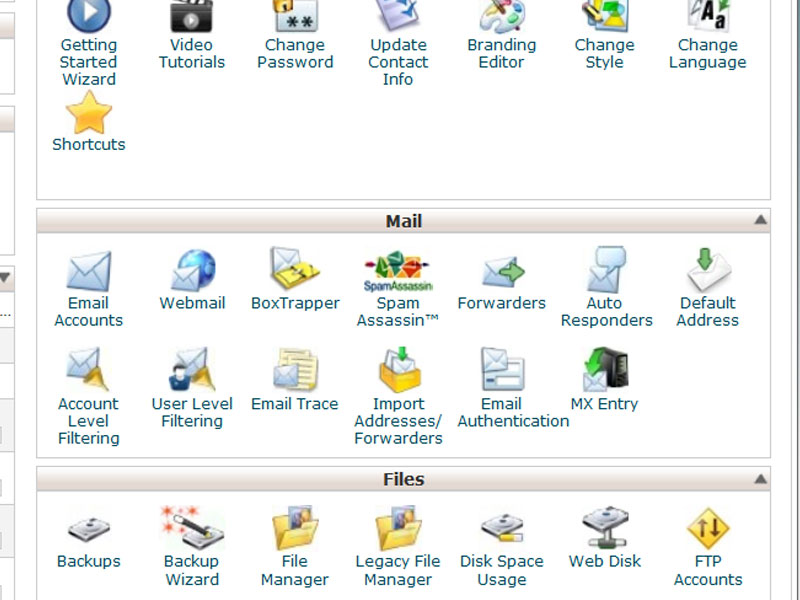
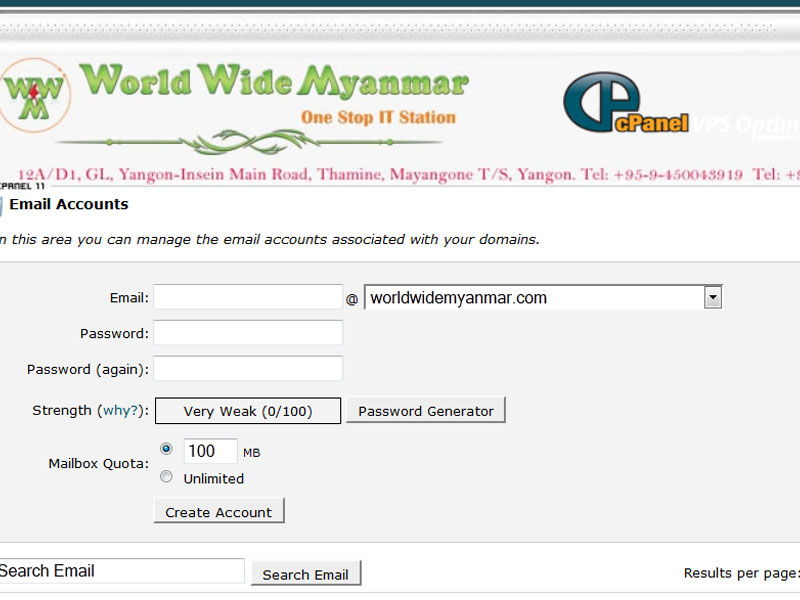
Email Account တစ်ခုကို အလွယ်တကူတစ်ဆောက်ရန်အတွက် မိမိ၏ cPanel ကိုအရင်ဆုံး Login ဝင်ရောက်ရပါမယ်။ မိမိ၏ cPanel ထဲရောက်ပြီဆိုရင် Mail ဆိုတဲ့ Options List ထဲမှာ Email Accounts ဆိုတာကို ရွေးချယ်ပြီး Email Account များကို ပုံမှန် ပြထားတဲ့အတိုင်း တစ်ခုချင်း ထည့်သွားလို့ရပါတယ်…
Email Account များကို ဖန်တီးပြီးပါက http://webmail.yourdomainname.com သို့မဟုတ် http://www.yourdomainname.com:2095 ကနေ ဝင်ရောက်အသုံးပြုနိုင်ပါတယ်။
Email Accounts – allows you to create e-mail accounts, define passwords and quotas for them. You can separately manage the e-mail accounts for a chosen domain.
WebMail – cPanel webmail allows you to access the webmail programs (Horde, Squirrelmail and RoundCube) included in cPanel. You can read your emails through a web browser.
SpamAssassin – is an automated email filtering system that attempts to identify spam messages based on the content of the email’s headers and body.
Forwarders – using e-mail forwarders will allow you to send copies of all your messages from one e-mail account to another. You can also send the messages from all the accounts with one domain to the corresponding ones with another domain.
Auto Responders – setting auto responder emails.
Default Address – this feature will “catch” all the mails that are sent to an invalid email address for your domain.
User Level Filtering – here you can manage filters for each user. Each user’s filter is processed after the main account filters.
Account Level Filtering – allows you to manage the filters for the main account. There you can also test the existing filters.
Import Addresses/Forwarders – allows you to import e-mail addresses or forwarders from Excel spreadsheet files (.xls) or comma-separated values sheet files (.csv).
MX Entry – you can change the MX records for your domain and define on which server to deliver the messages.
Email Authentication – this tool allows to include additional details in the messages’ headers so they can be automatically recognized by the recipients as legitimate e-mails. Such techniques are the DKIM and SPF records.
SpamExperts – an advanced spam prevention and protection system. Detailed instructions on how to use the tool can be found in the SpamExperts tutorial.
