Linux Malware Detect (Maldet) ထည့်သွင်းအသုံးပြုခြင်း
Linux Malware Detect (Maldet) ထည့်သွင်းအသုံးပြုခြင်း
ဒီတစ်ခါတော့ shared hosting တွေအတွက် အထူးကောင်းမွန်တဲ့ Linux Malware Detect (LMD) လေးကို ဖော်ပြချင်ပါတယ်။ Server Administrators တွေအနေနဲ့ အသုံးပြုတဲ့ tool လေးပါပဲ။ Shared Web Hosting တွေမှာ ယိုပေါက်ရှိတဲ့ site တွေကနေ မိမိတို့ရဲ့ server ကိုဒုက္ခမျိုးစုံပေးနိုင်ပါတယ်။ ဒီအတွက် server တစ်ခုမှာ ClamAV တို့လို anti-virus engine တွေကိုသုံးကြသလို Malware Detection အတွက်လည်း Maldet ကိုသုံးကြပါတယ်။
Linux Malware Detect (LMD) is a malware scanner for Linux released under the GNU GPLv2 license, that is designed around the threats faced in shared hosted environments. It uses threat data from network edge intrusion detection systems to extract malware that is actively being used in attacks and generates signatures for detection.
ထည့်သွင်းအသုံးပြုပုံကတော့
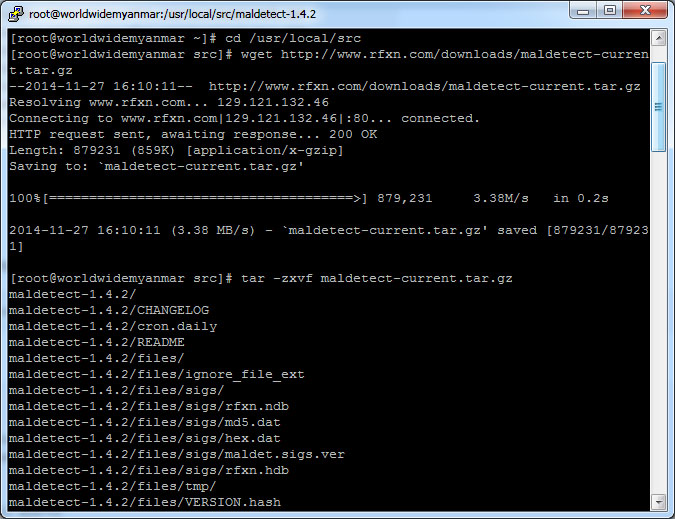
# cd /usr/local/src
# wget http://www.rfxn.com/downloads/maldetect-current.tar.gz
# tar -zxvf maldetect-current.tar.gz
# cd maldetect-1.4.2
# ./install.sh
Linux Malware Detect v1.4.2
(C) 2002-2013, R-fx Networks <[email protected]>
(C) 2013, Ryan MacDonald <[email protected]>
inotifywait (C) 2007, Rohan McGovern <[email protected]>
This program may be freely redistributed under the terms of the GNU GPL
installation completed to /usr/local/maldetect
config file: /usr/local/maldetect/conf.maldet
exec file: /usr/local/maldetect/maldet
exec link: /usr/local/sbin/maldet
exec link: /usr/local/sbin/lmd
cron.daily: /etc/cron.daily/maldet
maldet(17762): {sigup} performing signature update check…
maldet(17762): {sigup} local signature set is version 201205035915
maldet(17762): {sigup} new signature set (2014112423513) available
maldet(17762): {sigup} downloaded http://cdn.rfxn.com/downloads/md5.dat
maldet(17762): {sigup} downloaded http://cdn.rfxn.com/downloads/hex.dat
maldet(17762): {sigup} downloaded http://cdn.rfxn.com/downloads/rfxn.ndb
maldet(17762): {sigup} downloaded http://cdn.rfxn.com/downloads/rfxn.hdb
maldet(17762): {sigup} downloaded http://cdn.rfxn.com/downloads/maldet-clean.tgz
maldet(17762): {sigup} signature set update completed
maldet(17762): {sigup} 11866 signatures (9965 MD5 / 1901 HEX)
Install လုပ်ပြီးတာနဲ့ maldet ရဲ့ configuration လေးကို အနည်းငယ်ပြင်ပေးရပါတယ်။
vi /usr/local/maldetect/conf.maldet
အဓိကပြင်ပေးရမှာက
email_alert=1 (email alert ဝင်လာစေရန်အတွက်)
email_subj=”Maldet alert from $(hostname)” (Email ဝင်တဲ့အခါ ပေါ်မဲ့ subject)
email_addr=”[email protected]” (ဘယ် email ကို alert msg ပို့မလဲဆိုတာ ထည့်ပေးရန်။ အများဆိုရင် ‘,’ ခံပေးရန်)
quar_hits=1 (တွေ့ရှိတဲ့ malware virus ကို လှောင်အိမ်သွင်းရန်)
အဲ့တာလေးတွေပြင်ပေးရင် ရပါပြီ
အကယ်၍ ClamAV သွင်းထားတယ်ဆိုရင်
clamav_scan=1 ကိုပြောင်းပေးရပါမယ်။ (Default လည်း 1 ပါပဲ)
ClamAV နဲ့တွဲပြီး scan လုပ်တာ ပိုပြီးတော့ မြန်ပါတယ်။ ပိုပြီးတော့ virus တွေကိုဖမ်းနိုင်ပါလိမ့်မယ်။
အသုံးပြုပုံကတော့
maldet -a /home
ဆိုပြီးထည့်ပေးရပါမယ်။ /home ဆိုတာက ကိုယ်ထည့်ချင်တဲ့နေရာ သတ်မှတ်ပေးပါမယ်။ ဥပမာ /home/mgmg/public_html ကို scan လုပ်ချင်တယ်ဆိုရင်
maldet -a /home/mgmg/public_html
ဆိုပြီး လုပ်နိုင်ပါတယ်။ ၄င်း directory အတွင်းက file တွေအားလုံးကို scan ဖတ်ပေးမှာပါ။
scan ဖတ်ပြီးတဲ့အချိန်မှာ report ကိုပြန်ကြည့်လို့လည်းရပါတယ်။
maldet –report number-xxxx.xxxxx
စသည်ပေါ့
နောက်တစ်ခုကတော့
ပြီးခဲ့တဲ့ ၂ ရက်လောက်က ပြင်ထားတဲ့ file တွေကိုပဲ scan ဖတ်ချင်တယ်ဆိုရင်
maldet -r /home/mgmg/public_html 2
ဆိုပြီး ထည့်ပေးရပါမယ်။
maldet နောက်က သူ့ရဲ့ option တွေတော့ အများကြီးရှိပါတယ်။
မှာထပ်မံလေ့လာနိုင်ပါတယ်။


